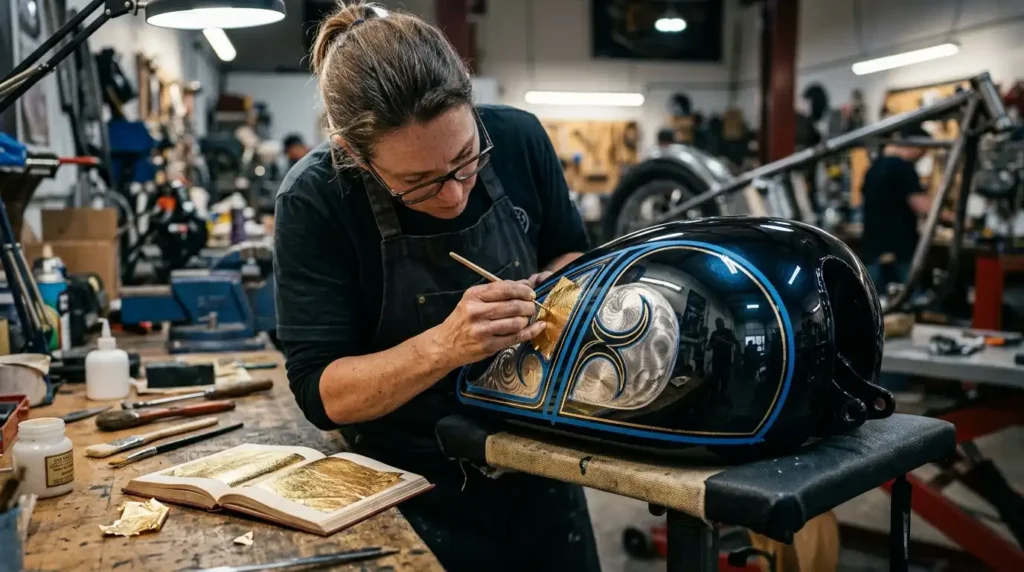
In the world of custom automotive painting, few finishes command attention quite like real metal leafing. Whether it is 23-karat gold, silver, or variegated copper leaf, metal leafing adds a brilliant, three-dimensional shimmer to motorcycle tanks, hot rod panels, and custom helmets that liquid metallic paints simply cannot replicate. However, working with leafing requires a delicate balance of precision timing, surface prep, and specialized chemical sealing.
Applying the leaf is only half the battle; the real test comes when it is time to lock it down under a crystal-clear topcoat. One wrong step with solvent application or air pressure can dissolve your sizing, cause the leaf edges to lift, or lead to disastrous clear coat delamination. Mastering clear coating over real metal leafing demands a clear understanding of sizing windows, burnishing techniques, and dust-coat clearing passes.
Choosing the Right Leaf and Sizing Glue
Before diving into application, selecting the appropriate leaf type and adhesive (sizing) is crucial for a durable, long-lasting finish.
- Genuine Gold Leaf (22k–24k): Real gold is inert, meaning it will not oxidize, tarnish, or react chemically under solvent-based clear coats. It offers unmatched brilliance and longevity.
- Silver and Imitation Leaf (Composition Leaf): Silver, copper, and aluminum leaf are susceptible to oxidation. Exposure to air, moisture, or certain clear coat solvents can turn silver black or copper green over time. These metals must be sealed quickly and thoroughly.
- Fast-Drying Sizing: Modern custom painters rely on high-performance oil-based or quick-drying solvent sizing glues. Fast-drying sizing reaches its open “tack window” in roughly 5 to 15 minutes, allowing you to lay leaf quickly without waiting hours for traditional slow sizes to setup.
Step-by-Step Metal Leaf Application
Achieving a flawless leafed graphics layout requires methodical surface preparation and careful leaf handling.
1. Surface Preparation and Layout
Start with a fully cured, sanded basecoat (typically prepped with 800-grit wet sandpaper or a scuff pad). Clean the surface thoroughly with a non-oil solvent degreaser. Use high-performance fine-line masking tape to define the boundaries of your leafed graphic or pinstripe layout.
2. Applying the Size
Apply a thin, uniform coat of sizing glue inside your taped boundaries using a soft pinstriping brush or a dedicated detail mini-applicator. Avoid thick pools of size, as uncured size underneath the leaf will stay soft and lead to clear coat cracking later. Allow the size to flash until it reaches a proper “knuckle tack”—when you touch it with your knuckle, it should feel tacky and squeak without transferring wet glue to your skin.
3. Laying and Burnishing the Leaf
Carefully lay sheets of leaf over the tacky size using a gilding tip or transfer paper. Gently press the leaf down with a soft makeup brush or cotton gilding pad. Once the entire area is covered, burnish the leaf using a soft velvet pad or cotton ball in light circular motions to remove excess leaf (skews) and smooth down all seams.
Engine Turning and Engine Spinning Effects
To create the iconic swirling pattern often seen on vintage hot rods, fire trucks, and custom choppers, painters perform a technique called engine turning or spinning:
- Once the leaf is burnished, press a soft velvet-wrapped pad, a piece of engine-turning foam, or a spinning tool lightly onto the leaf.
- Rotate the tool 180 to 360 degrees in overlapping grid patterns.
- The light abrasion catches the light at varying angles, giving the gold or silver leaf a mesmerizing, holographic swirl effect before clear coating.
Preparing Metal Leaf for Clear Coat
Once your leafing and optional engine spinning are complete, the surface is extremely fragile. You cannot simply blast the leaf with a heavy coat of high-solids 2K polyurethane clear coat right away, as the aggressive solvents will penetrate the leaf seams and dissolve the sizing underneath.
1. Cleaning Away Loose Skews
Use a ultra-soft tack cloth or a clean compressed air blow gun set at low pressure (under 15 PSI) to gently blow away all loose leaf dust. Any stray gold particles left on the surrounding paint will float into your clear coat and ruin your clean paint lines.
2. Pinstriping Outlines (Optional)
If you plan to outline your leafing with 1-Step lettering enamel or urethane pinstriping paint, do it now. Ensure your pinstriping paint is fully cured or flashed according to manufacturer guidelines before clearing, or use a clear-compatible urethane basecoat line to avoid lifting.
The Dust-Coat Technique: How to Clear Coat Over Metal Leaf
The golden rule of clear coating over real metal leafing is to lock the edges down gradually. You must create a barrier layer before laying down a full flow coat.
- Pass 1 (Light Dust/Mist Coat): Set your spray gun or airbrush to fine atomization with a slightly wider fan. Apply a very light, dry “dust coat” of 2K urethane clear over the leafed areas. This light pass places minimal solvent on the surface, locking down the raw edges of the leaf without softening the sizing below. Allow it to flash completely (10–15 minutes).
- Pass 2 (Medium Lock Coat): Apply a second, slightly wetter medium coat of clear. This pass builds an effective film barrier over the metal and fills in any microscopic gaps along the leaf seams. Allow to flash fully.
- Passes 3 & 4 (Full Wet Flow Coats): Now that the leaf is safely encapsulated behind a dry barrier, spray 2 full, wet flow coats of high-gloss 2K clear coat. This builds the depth necessary to completely bury the edges of the leaf and pinstriping.
Color Sanding and Burying the Edges
Because metal leaf sheets and pinstriping add physical thickness to the paint surface, you will feel a distinct ridge along the edges of your graphics after your initial clear coat session cures.
To achieve a glass-smooth, “buried” finish:
- Allow the initial clear coat to cure completely for at least 24 to 48 hours.
- Block-sand the cleared surface flat using 800-grit to 1000-grit wet sandpaper, taking extreme care not to sand through the clear coat into the gold leaf.
- Wipe the panel clean, re-mask if necessary, and apply 2 final wet coats of premium 2K clear coat.
- Buff and polish the cured final clear coat to a mirror finish.
Elevating Your Custom Finishes
Combining real metal leafing with professional clear coating techniques creates a level of depth and luxury that sets custom paint work apart. By selecting the right size, executing precise burnishing, and protecting your layout with careful dust-coat clearing passes, you can ensure your gold and silver leaf graphics remain brilliant and durable for years to come.